PAINT THE TOWN RED!

I am just back from a gorgeous Valentine's weekend in St. Barths and I just can't get the color red out of my mind! This incredible Island is covered in hints of red everywhere you go. From the rooftops to the flowers, this beautiful color made me giddy with joy. Red is a great color to bring into the home as well. Wether it is just a touch in a corner or covering a whole wall, this elegant, rich color will brighten up your day! 

St Barths

St Barths

Red Roofs in St Barths

Red Roofs in St Barths

Eden Rock Hotel

Front door to Eden Rock Villas

Front door to Eden Rock Villas

The Bright Group- Red Velvet Chair

The Bright Group- Red Velvet Chair

Global Views Tufted Bench

Global Views Tufted Bench

New Traditionalists Bar

New Traditionalists Bar

Access To Design Office- 200 Lex

Access To Design Office- 200 Lex

*Note: The images contained in this blog are not property nor work of New York Interior Design, Inc. They are strictly images acquired for inspiration and admiration of the industry's talent. New York Interior Design, Inc. does not claim rights to any of the works pictured above. All photos in the portfolio section of nyinteriordesign.com are the work and designs of New York Interior Design, Inc.

FLATIRON GLAM

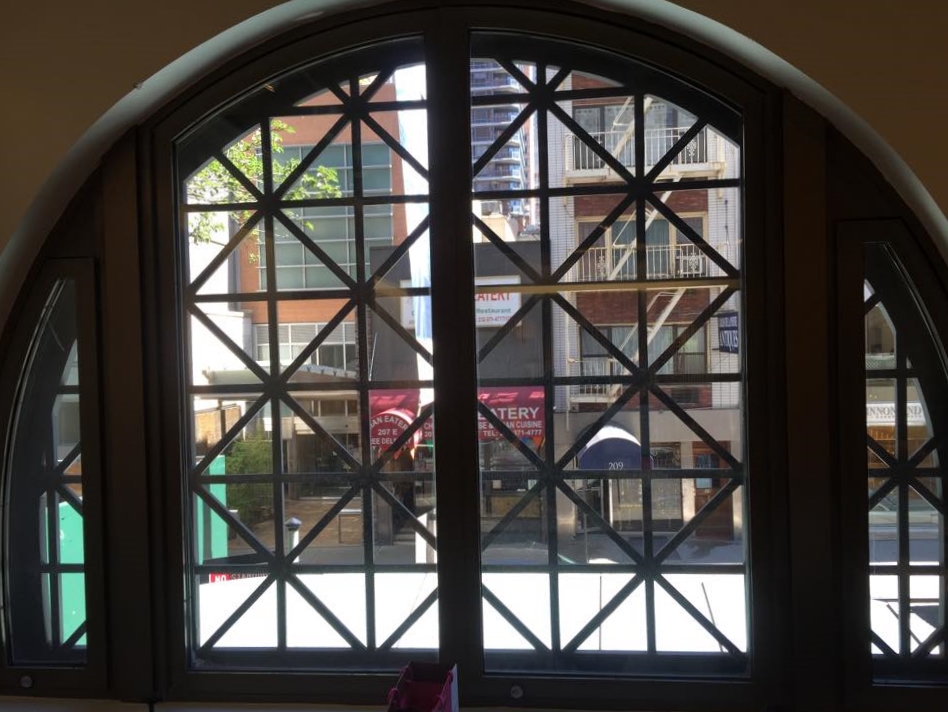
Once in awhile as a designer you come across that perfect project. The space, the location and the client are all very interesting and exciting.  That was the way I felt about this  beauty in the center of the Flatiron District. The apartment is in a Landmark building on very desirable Fifth Avenue with oversized windows and 10.5-foot ceilings allowing light to flood the apartment. The highest level of finishes complement this fully restored 1897 Beaux Arts building. Located in a very cool area surrounded by new interior design shopping destinations and incredible restaurants,  This building is one of downtowns finest new conversions . It was renovated with a more traditional style in mind and the highest level of finishes. The cherry on the cake is the  fully restored copper cupola and curved plate glass windows... 

Doing the interior of a space like this comes very easily, it was conceived of totally with my client in mind and the way she lives her life.. exciting, adventurous ,colorful and worldly... Photo credit : Beckerman Photography

1897 Beaux Arts 

1897 Beaux Arts 

The rug started it all.. Fort Street Studio in a round motif to mimic the round windows... Walls Maya Romanoff white paper..

The rug started it all.. Fort Street Studio in a round motif to mimic the round windows... Walls Maya Romanoff white paper..

We utilized one of my favorite lights as wall sculpture by: Aqua in purple silk. Dining chairs: High Style Deco 

We utilized one of my favorite lights as wall sculpture by: Aqua in purple silk. Dining chairs: High Style Deco 

The whole back wall was custom built to incorporate wood paneling, headboard, floating nightstands and base...

The whole back wall was custom built to incorporate wood paneling, headboard, floating nightstands and base...

Closeup of another fav of mine metal Stephanie Odegard dresser...

Closeup of another fav of mine metal Stephanie Odegard dresser...

1970's fur topped Stools were found at 1St Dibs 

1970's fur topped Stools were found at 1St Dibs 

This sexy den incorporates black velvet drapes with a textured black wallcovering 

This sexy den incorporates black velvet drapes with a textured black wallcovering 

Powder room wallcovering/ bronze Crocodile 

Powder room wallcovering/ bronze Crocodile 


THE "MAN CAVE " BAR LOUNGE

One of the most exciting projects to date is the "bar lounge" I was asked to design in West Harrison, NY. I met with this delightful young couple (referred to me by former clients & friends whom I adore)  who knew exactly what they wanted: a bar lounge where their living room was supposed to be. A place where their friends could come over, have a drink, relax and hang out. This special place would also have access to a patio in the warm months... 

The renovation started with designing a very detailed bar. We used hammered pewter for the countertop, we trimmed the outside of the bar with the same "X" detail as the barstools . The flush mount pendants resembled something that would have been used in a Paris bistro, the glass shelves were nice and thick with a antique mirror used behind the very high def TV. 

Next we tackled the fireplace. The existing one was totally gutted, we designed the mantel and surround from scratch. The room was cocooned in a Robin's Egg Blue grasscloth, while the wall to wall carpet made the room feel very soft and private... the tufted mohair chairs were also custom designed and added another layer of warmth and sophistication.  The cherry on the cake was the luxurious lightweight wool window treatments ...

Not only did this space become the most popular hang out place in the neighborhood, but as an added surprise it was just featured in Westchester Home magazine! The Winter 2016 issue! Happy Holidays to all !!!! 

Photo credit: Jonathan Beckerman Photography  

BEFORE

BEFORE

BEFORE

BEFORE

PLANNING STAGES

PLANNING STAGES

DESIGNING THE BAR

DESIGNING THE BAR


TIPS FOR A SUCCESSFUL PHOTOSHOOT

You know all of those gorgeous portfolio shots that adorn our website? Yes, I love them, too! And I would love to share some behind-the-scenes tips for what it takes to successfully photograph your finished projects. Working with Evelyn for a little over a year now, I can definitely say one of the most exciting (and exhausting!) work days is when we spend the day shooting a client's finished home. Not only is it rewarding to see the finished product, it is also a great time to sit back and analyze what finishing touches might be missing to make the space truly exceptional. I thought it would be fun for our readers to get an insider's view on all of the details that go into having a gorgeous portfolio. Below are Three Key Steps I believe you should follow for a successful photoshoot:

  1. Research: The number one tip is doing your homework and finding a talented, professional photographer. Having experienced taking photos myself and hiring a professional, it is a drastic difference from the resulting photographs to the overall experience. Make sure it is someone with great attention to detail, and of course that is fun and flexible to work with! I I love being able to see the shots in the camera frame and work with them to get the perfect angles. 

  2. Plan: Once you have chosen and discussed the project with the right photographer, the most essential step is to organize and schedule everything on time. Make sure to book a free day with your client to photograph their home (preferably at a time that you will not disturb them and their daily activities). Make a list of everything you will need to bring with you: props, accent pieces, and even an iron! We always check beforehand if any reflective services will need to be cleaned; if bed sheets are wrinkled and need ironing; and what flower colors/shapes will look best with the design.

  3. Prep: The day before make sure to gather all items you will need to take to the photo shoot. I also have to warn, you might be running around like a headless chicken! This includes purchasing fresh flowers for arrangements throughout each space; vases to put flowers in; windex for mirrors and glass tops; an iron or steamer to touch up bed sheets and drapes; and depending on how complete the project is you may also need to bring throw pillows, artwork, or small furniture pieces to set the stage. Another great tip is to bring your best pair of shoes for the bedroom shots--they make it look natural and sexy.

  4. Game Day: Always remember you are in someone else's home and everyone working on "the set" should be very careful to leave everything in the same way they were found. This is probably the most exhausting part of the process because I go around taking pictures of every area we plan to change so I can remember later on how to return everything to it's original setting. And then it's move that, carry there, clean here, set your props and voila the set is ready for the camera! Please don't forget to wear comfortable clothes and shoes! Lastly, you should know that a professional photographer requires concentration and time for each shot so he or she will be very focused, but I highly recommend bringing an extra hand for setting up the space to be picture perfect. 

Evelyn has been very lucky to work with a fair share of talented photographers over the years and we have loved working with our most recent paparazzo, the very talented, Jonathan Beckerman of Jonathan Beckerman Photography (see some photos below). 

The photographer in action!

The photographer in action!

A final Kitchen shot. Note the strategic placement (and removal!) of counter items. Less is more always.

A final Kitchen shot. Note the strategic placement (and removal!) of counter items. Less is more always.

A final Bathroom shot. Make sure the shower doors are dry and wiped clean! And toilets should always have the lid closed.

A final Bathroom shot. Make sure the shower doors are dry and wiped clean! And toilets should always have the lid closed.

I hope these tips were helpful, let us know about your experiences in photographing interiors. We'd love to hear what helps you create a gorgeous portfolio! 


-Yesenia/ "Jessie"

THE TRANSFORMATION OF MY OWN HOME ...

As an interior designer working in this industry for almost 20 years I have done my share of major renovations and total gut jobs, however this one was very different. It was mine...

We lived in this house for many years, this is where my kids grew up. I did the inside many times over, but I never got to the outside, which I disliked immensely from the very start.   

Well, this was the summer of change... 

I believe the following are the most important things to have lined up before you start a project like this: 

Hire an architect whose work you admire...do your homework (walk in knowing exactly what you want to achieve). 

Hire a contractor whom you trust, ask for three references..

Prepare for your life to be upside down for an extended period of time. 

Our contract read three months for this renovation, we were very lucky, usually things take much longer than expected. 

We basically transformed the whole facade of our house. We raised the roof, replaced all the front windows (painted the others to match) substituted cedar shingles for stucco. (We used real stucco not that fake stuff so many people are using today). I believe some of the most dramatic changes were made by selecting Palladian windows, raising the roof, choosing a custom gray color for the stucco..and finding the huge French antique sconces.. 

I'm in the industry, I knew what to expect, however it wasn't all easy. We lived in the back of the house, however there was still a lot of dust and disarray. Believe it or not the hardest part for me was not being able to open or see through the windows (they covered them in plastic) while applying the layers of stucco. Also, not being able to enjoy the backyard during the summer was hard, and of course losing my privacy was a big one. Most of all, keep in mind that there are hundreds of decisions to make. It can be overwhelming! Hire professionals... interior designers, contractors, people you can count on.  

This project was truly a metamorphosis for me. It is something I really wanted to accomplish for a very long time. I feel it makes me better at what I do. It's important for me to truly understand what my clients go through. Most of all I am so happy we got through this experience, we are all happy with the results. Hopefully my family and I will have the opportunity to enjoy this new home for many years to come.. Yes, it was well worth it!

BEFORE  

BEFORE  

BEFORE

BEFORE

DURING

DURING

DURING

DURING

DURING

DURING

AFTER

AFTER

AFTER

AFTER

AFTER

AFTER

ARCH MADNESS

What is a structure without windows? They are like the jewelry of a building's facade and street presence. The beauty of windows stems from their dense history in ancient architecture and design styles, but more so their evolvement into modern times without erasing classical influences from the past. We are currently admiring the beauty of palladian windows, which come in a variety of sizes, shapes, and finishes. Take a look at some of the images we have gathered of eye-stopping arches in today's built environment:

11749519_10205803082209889_1419833482_n.jpg


NYC TOWNHOUSE CURB APPEAL

In my adventures through the city, I come across a lot of breathtaking architecture and building designs. Especially when stuck in bumper to bumper traffic going Crosstown, it is always a treat to admire the rows of townhouses that line the bustling Manhattan streets. Take a look at some of these snapshots of gorgeous residences that represent quintessential New York City living:

THE DORILTON

One of the most rewarding experiences I have had as an interior designer is to decorate an apartment in a prewar landmark beauty.  I have just been honored with decorating such a gem. The Dorilton was constructed in 1902 and designed by Janes & Leo, the New York City-based architectural firm of Elisha Harris Janes and Richard Leopold Leo for real estate developer Hamilton M. Weed. It is located on the Upper West Side of NYC. 

The building is noted for its opulent Beaux-Arts style limestone and brick exterior, featuring monumental sculptures, richly balustraded balconies, and a three-story, copper and slate mansard roof. The exterior masonry, decorative terra-cotta work and chimneys and roof were expertly restored in 1998 by the Walter B. Melvin architectural firm.

This is our latest project... I am so excited to share it with you!  Please Enjoy!!! 

All photos of this exceptional exterior and interior are by: Jonathan Beckerman 

wFN-The-Dorilton_Benatar_050915_30.png

UNIQUE SURFACES

The sky is the limit when it comes to creativity in design. Texture, color, abstract forms, and material finishes all become a work of art when mixed together to create gorgeous, one-of-a-kind  pieces. A unique surface in an unexpected way has always caught my attention. Using your table top as a unique display of creativity and craftsmanship is a perfect opportunity for making a statement and stepping out of the box. Check out what I mean in these snapshots collected throughout my daily travels:

Iridescent ripple effect glass Dining table

Iridescent ripple effect glass Dining table

Metal inlayed glass side table with hammered metal legs

Metal inlayed glass side table with hammered metal legs

White pearlescent mosaic tile drink table in a radial pattern

White pearlescent mosaic tile drink table in a radial pattern

Round metal inlayed side table with hammered iron legs

Round metal inlayed side table with hammered iron legs

Blue stained glass drink table with a ripple effect

Blue stained glass drink table with a ripple effect

ONE STOP SHOP

Spring is finally blooming and our city is starting to look much more green, colorful, and alive again. This calls for a trip to the NYC Flower District! Recent projects have required shopping for fresh flowers and plants to liven up a space and the first place that comes to mind is W28th street between 6th and 7th Avenues. The flower district originally spanned a series of blocks but today is reduced to one entire city block lined with a plethora of florist wholesalers. I call this a "one stop shop" because you can find anything from a 6 foot living ficus tree, fresh flowers, to forever-lasting silk plants and all potting accessories to go with them. This is where the pros go! Take a look at some images from our most recent visit:

flowerdistrict_nyinteriordesign


ABSTRACT ART HUNT


Recently, I have been scouring the city for great looking, unique pieces of artwork in the abstract style, for some savvy  clients.  From paintings to wall sculptures, it has been an exciting adventure to see what is currently being exhibited in the art market today. One of the most popular areas of Manhattan for art is the Chelsea neighborhood, recognized for its plethora of art galleries, constantly updated exhibitions, and the variety of up and coming artists. Another fantastic destination for art is the 10th floor of the NYDC (www.nydc.com). There is always a new exciting art exhibition promoting exceptional artists. Take a look at some of the pieces I loved at the various galleries below:

STEVEN W. MILLER

Private Art Gallery | New York, NY | By Appointment Only

_____________________________________________________________________________________

KATHI ROBINSON FRANK

1stDibs at New York Design Center • 10th Floor

200 Lexington Avenue | New York, NY 10001

                                                                      &nbs…

                                                                                                    "Transition"

                                                                         Mixed media on canvas 72" x 56" (on hold)

_____________________________________________________________________________________

ANDREW ZIMMERMAN

March 12-April 11, 2015

Sears-Peyton Gallery 

210 Eleventh Avenue, Suite 802 | New York, NY 10001

                                                                       &nb…


                                                                                                  Rescue Green, 2015

                                                                                                             ZIM344

                                                                       wood panel with urethane paint, 42 1/2 x 26 inches

Light Lemon, 2015ZIM345wood panel with urethane paint, 46 x 36 1/2 inches

Light Lemon, 2015
ZIM345

wood panel with urethane paint, 46 x 36 1/2 inches

A13 Atlantik Blau MET, 2014ZIM327wood panel with urethane paint, 46.5 x 35 x 1 3/4 inches

A13 Atlantik Blau MET, 2014
ZIM327

wood panel with urethane paint, 46.5 x 35 x 1 3/4 inches

_____________________________________________________________________________________

AMBER COWAN

"Chroma Revival"

Heller Gallery

303 10th Avenue | New York, NY 10001

GRAY 802014Flameworked American pressed glass/steel/mixed media68 x 24 x 5 in.

GRAY 80

2014
Flameworked American pressed glass/steel/mixed media
68 x 24 x 5 in.

SKY BLUE, COBALT AND SLAG (DETAIL)2014Flameworked American pressed glass/steel/mixed media34 x 39 x 9 in.

SKY BLUE, COBALT AND SLAG (DETAIL)

2014
Flameworked American pressed glass/steel/mixed media
34 x 39 x 9 in.

SKY, MILK AND METAL2014flameworked American pressed glass/mixed media32 x 9 x 7 1/2 in.

SKY, MILK AND METAL

2014
flameworked American pressed glass/mixed media
32 x 9 x 7 1/2 in.

_____________________________________________________________________________________

ANNI KOCH-KNUDSEN

Agora Gallery

530 West 25th Street | New York, NY 10001


A SUCCESSFUL BATHROOM RENOVATION

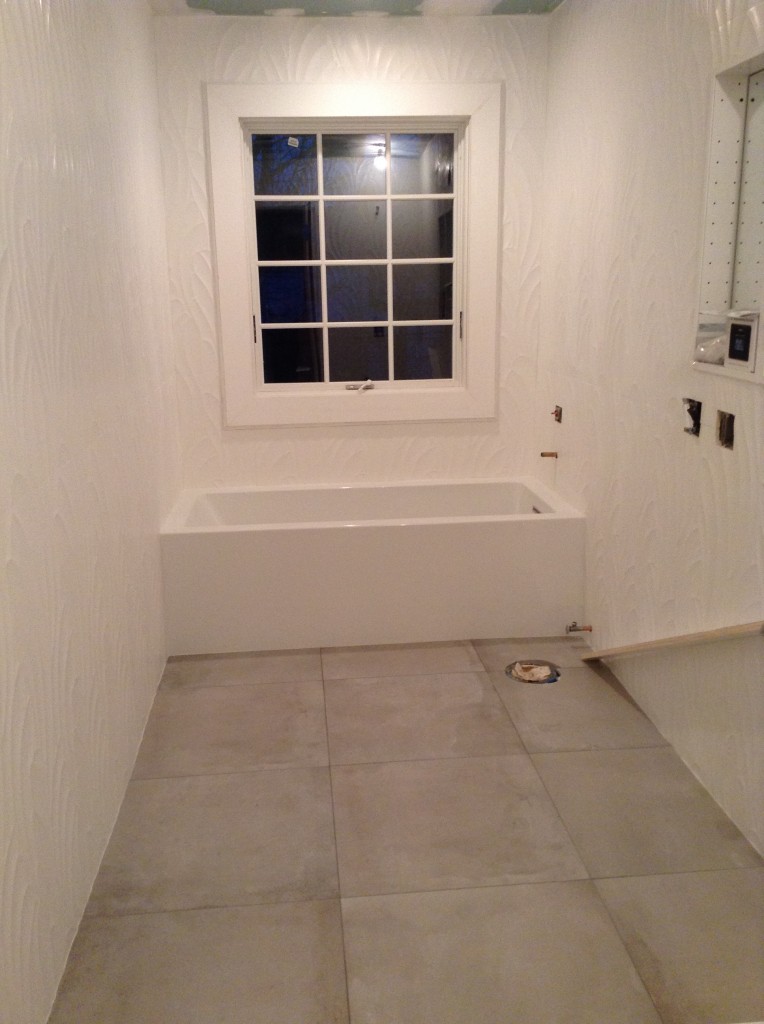
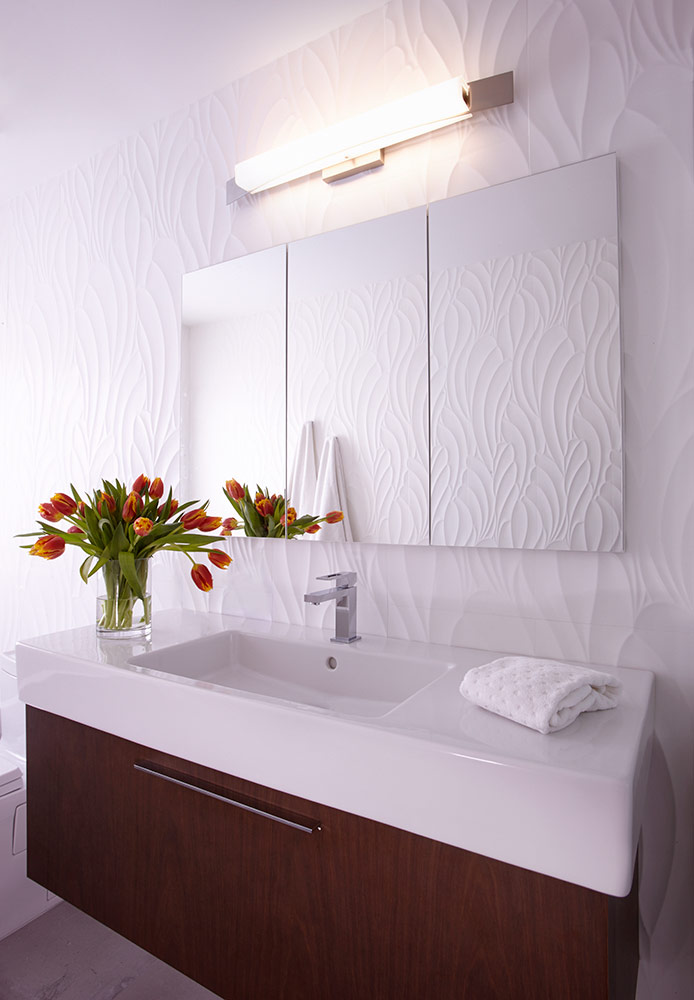
People always ask me what goes into renovating a full bathroom, so I will explain in very simple terms the steps that are involved... First, hire an Interior Designer. Even if all the plumbing is staying in the same place you will need to select every surface, plus plumbing fixtures and hardware... Next hire a Contractor, most of the time your designer will recommend someone trustworthy and reliable . Make sure you have great photos of the "before" bathroom. You will also need a floor plan of what the bathroom looks like now, and if you are changing any square footage or moving plumbing you need a floor plan of the new intended space.  My personal inspiration comes from the trade market, there is always something new and cutting edge . Next, it is time to go shopping! I like to start with selecting the floor and wall tile first. There are wonderful new products out there, things that were unimaginable a few years back.  Texture is the newest trend! I usually do tile or marble all the way up to the ceiling in a master or kids bathroom. (tile half way up the wall is out of style) I also will use wallcovering in master baths, and powder rooms. If wallpaper is applied correctly in a bathroom it will not come down as some people believe...  If for example there is enough pattern on the floor with a gorgeous marble, sometimes only paint is needed on the walls. Just like with everything else in this industry, every bathroom has different parameters , design visions and budgets.

After you know what palette your floors and walls will be you need to shop for all of your plumbing supplies. Having your designer take you to reliable sources is key. Otherwise you could wait a LONG time for items that never ship... You need to select your shower body first, there are decisions to be made such as temperature control and pressure balanced  systems.. You need to select your bathtub, and your toilet. All these items have many details that your designer will explain. All the faucets in the bathroom will follow suit with the shower body. Are you selecting the new modern brass? (which is my favorite) Satin nickel ? or polished chrome? Remember that warranties are given in reliable showrooms with proven track records, the internet is NOT a good place to shop for these products.

Most important advice: PLAN AHEAD, HAVE ALL TILE, MARBLE, FIXTURES, VANITIES, MEDICINE CABINETS, FAUCETS, DRAINS, LIGHTING, ACCESSORIES (toilet paper holder, towel bars or hooks) DELIVERED TO YOUR HOME BEFORE the DEMOLITION BEGINS!!! This way your contractor can be in and out of your home quickly!!! If all products are there, and if your contractor shows up EVERY day as he or she should, all work should be complete in about three weeks... unless there are unforeseen complications.  USE Professionals!!!

So plan that new spa, that place to relax and unwind in , that special oasis especially for YOU!  If you hire the right people everything should flow just like cascading water.. The following "Before"and "After" photos are of my latest bathroom project. ENJOY!

BEFORE PHOTOS

Photo-Jan-01-2-49-44-PM-e1426687145899-764x1024.jpg
Photo-Jan-01-2-50-00-PM-e1426687236162-764x1024.jpg
Photo-Jan-01-2-50-14-PM-e1426687315771-764x1024.jpg

                                                                                                                                                                                                                 DEMO

unnamed-2.jpg

 IN PROGRESS

2015-01-22-17.24.03-764x1024.jpg
2015-01-22-17.24.12-764x1024.jpg

AFTER PHOTOS

wFN-16-Ceder-Drive_Benatar_03191568.jpg
wFN-16-Ceder-Drive_Benatar_03191582-1.jpg
wF-16-Ceder-Drive_Benatar_03191588-900x600.jpg
w-FN16-Ceder-Drive_Benatar_031915102.jpg

Photo Credit: Beckerman Photography